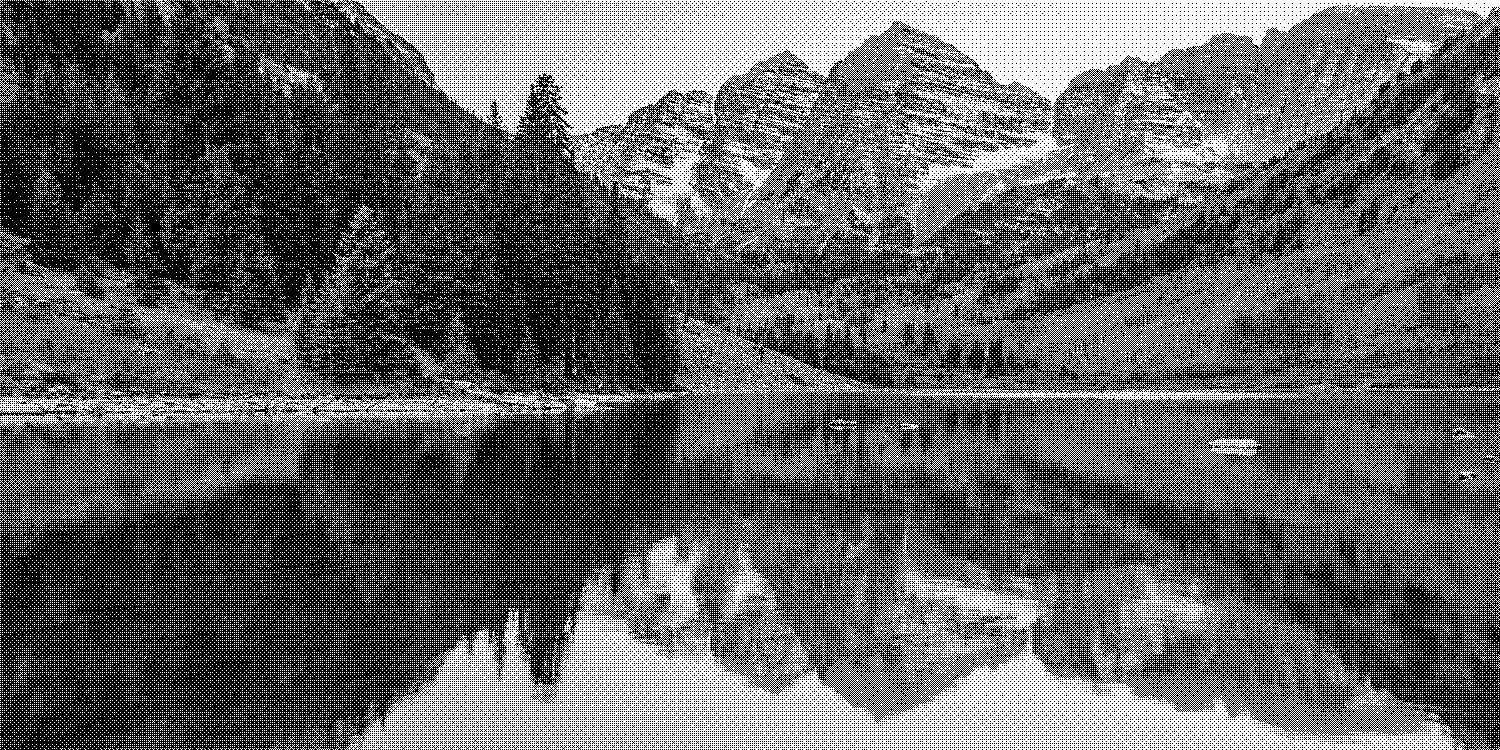
Continuing my research and implementation of dithering techniques, I have turned my attention to 1-bit ordered dithering methods, useful for creating graphics for the Playdate, a quirky, monochrome, handheld console (with a crank).
There are many dithering techniques available, but they are divided into two principle sections: ordered and error diffusion. This article will focus on the former.
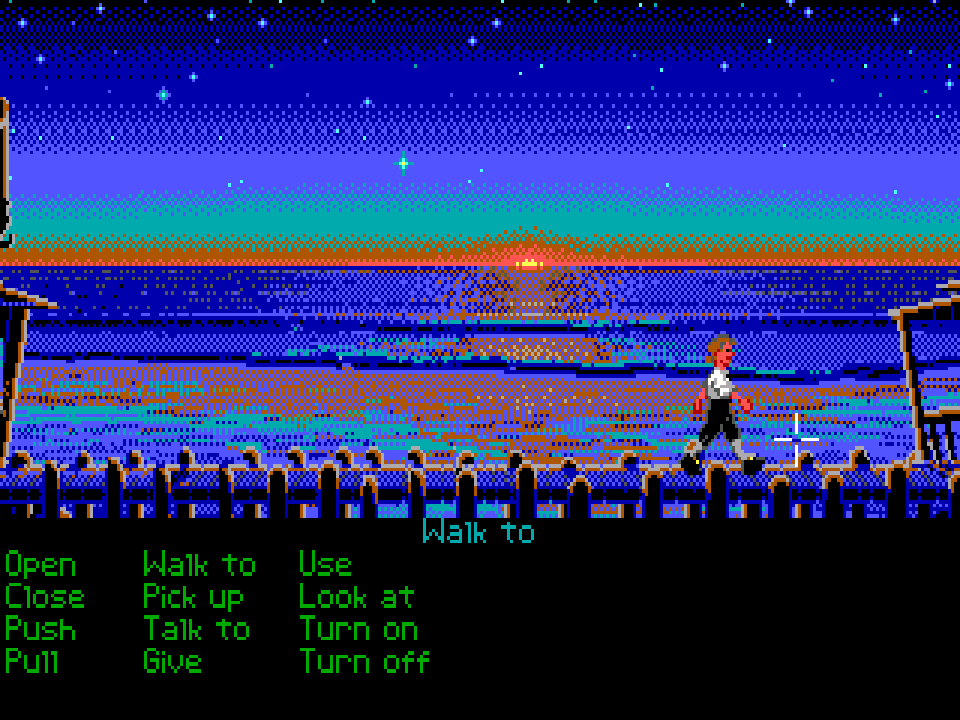
While error diffusion methods (especially the Floyd-Steinberg algorithm) are popular ways to create dithering effects, ordered dithering has the advantage for speed and also provides for a distinctive appearance, such as the gradient sky in the EGA version of Secret of Monkey Island.
In certain cases, ordered dithering is necessary for its speed or to be applied as a renderer, such as in The Return of the Obra Dinn.
This post will cover two programs which built up to creating a plug-in for Acorn to generate 1-bit images using an ordered dither algorithm.
Ordered Dithering Matrices - ordered_dithering.c
To implement ordered dithering, a matrix pattern is generated and is used as a tiled mask over the original image. The matrix can be a variety of sizes, such as 2x2 or 16x16. All of the examples I've seen have identical dimensions, so a 2x3 matrix is not used. The values assigned in the matrix are used to calculate the threshold value, whether a pixel should be set to white or black.
Matrix patterns
There does not seem to be one established way of how the matrix is populated. Even for a simple 2x2 matrix, I've noticed numerous examples in how the layout pattern is established, such as:
vs vs
I tested these different patterns on the same image, and it didn't appear that there was any noticeable difference in the generated 1-bit image.
The algorithm in ordered_dithering.c populates a matrix with the order, but it does not necessarily determine the value of the threshold. The pixel color value generally has a range from 0.0 to 1.0 or from 0 to 255, and this determines how the threshold value is compared. This is dependent on the system and the programmer on how they want to calculate and compare the values. When one retrieves the color component from a pixel using Objective-C, each color component (red, green, blue) has a float value from 0.0 - 1.0, but this could be easily adjusted to be between 0 - 255 by multiplying the component value by the integer 255.
If one wants to compare integer values, then a possible 2x2 matrix could be:
This comes out very close to the pattern, once these values are divided by 255, which would be the appropriate 2x2 matrix when comparing values between 0.0 - 1.0.
However, the values do not necessarily need to be evenly spaced. One could set custom threshold values to populate the matrix which will adjust the calculated value of each pixel. This might be necessary if evenly spaced values do not produce the desired dithered effect. Such an example with a 2x2 matrix might be:
The values are not evenly spaced as in the prior example, but it might prove necessary if the contrast of an image is too light or dark, so an adjusted set of matrix values is needed.
This small program will generate an ordered matrix, and some of these matrices are used in the following program ordered_dither.m. The original code, by Stephen Hawley, originates from the book Graphics Gems and has been updated for a more modern version of C.
While this program generates a suitable ordered matrix, other examples and patterns are available, such as a 3x3 matrix or a magic square where each row and column adds up to the same value.
The Algorithm - ordered_dither.m
ordered_dither.m is a small Objective-C program which is the basis for the dithering algorithm used in the plug-in discussed in the next section. A number of the example matrices displayed in this program come from the ordered_dithering.c program, the Dither: Ordered and Floyd-Steinberg, Monochrome & Colored web page, and several text books listed in the References section.
This program iterates over each pixel of the given image, converts the color to a grayscale version, and then compares the pixel value to the matrix. When a larger matrix is used, there is more variability to the ordered pattern, which reduces the noticeable tiling effect. The 16x16 matrix seems optimal, especially since it contains 256 values, which lines up with the 0 - 255 range that most color components encompass.
OneBitOrderedDither - Acorn Plug-in

All of the research and experiments were built up to create another plug-in for Acorn (the first plug-in being AGIfier, which created low resolution images with an EGA color palette). This new plug-in, OneBitOrderedDither, generates a black and white image using a 16x16 ordered dither matrix. Much of the logic for this plug-in is based from the ordered_dither.m program.
I first built AGIfier several years ago using Xcode 11.3.1 and macOS 10.14. I started creating OneBitOrderedDither using Xcode 14.2 on macOS 13.5.2, but I noticed an issue when I created a new Bundle — the new project was missing the Info.plist file. I went back to my older machine and started up the new project under Xcode 11.3.1, which generated the expected Info.plist, then brought the project over to my newer computer.
Once I was finished coding the plug-in, I moved the bundle over to the ~/Library/Application Support/Acorn/Plug-Ins folder, but the plug-in was not displaying in Acorn's menus. I checked the Console log and came across some hints that the bundle was not building with an appropriate Apple Silicon architecture, in addition to an Intel version. I had to check the project settings and ensured that it was not supposed to build for only the active architecture (ONLY_ACTIVE_ARCH = NO;), and this seemed to resolve the problem.
Download and Install:
- Download the file OneBitOrderedDither.acplugin.zip
- If your browser did not unzip the file, double-click on the file
OneBitOrderedDither.acplugin.zipso onlyOneBitOrderedDither.acpluginremains. - Copy the file
OneBitOrderedDither.acplugininto the folder~/Library/Application Support/Acorn/Plug-Ins
To Build and Install:
If you prefer to build from the source code and install the plug-in, follow these steps:
- Get the source code by going to the
GitHub project, or pull down the code using the command:
git clone https://github.com/edenwaith/OneBitOrderedDither.git - Build the project
- Find the plug-in:
Product > Show Build Folderin Finder and then dig into the folders to find the fileOneBitOrderedDither.acplugin - Copy the file
OneBitOrderedDither.acplugininto the folder~/Library/Application Support/Acorn/Plug-Ins
To run:
- Open a file in Acorn
- Select the menu
Filter > Color Adjustment > 1-Bit Ordered Dither